
TubeBuddy is a toolbox full of tools that help YouTube creators streamline the process of publishing a video and optimize video performance with tools like tag recommendations, keyword research, and bulk changes.
While TubeBuddy has a ton of tools (seriously, it’s a looong list) the two primary things I was most interested in were 1) Keyword Research and 2) help filling in some of the boxes on the YouTube Publish page to speed up that process. I’ll breakdown how TubeBuddy does with both of those.
Keyword Research
keyword research in TubeBuddy is simple, and not intimidating or confusing. Start by typing in a word or phrase and you get back a visual gauge showing you whether it’s good or bad based on the overall assessment of how many viewers are interested, how much competition exists, and how well the existing videos are optimized to serve the viewers. Each of those three categories is broken down just below the overall rating.
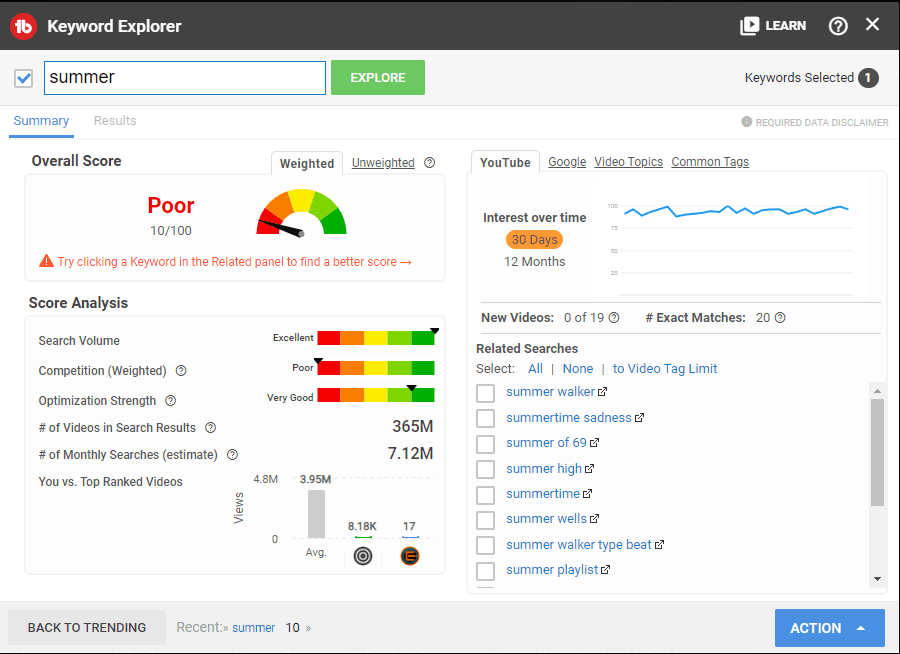
You can choose between weighted or unweighted. The weighted rankings take into account your channel – how it specifically would stack up to the competition for the given word or phrase. Unweighted is just a raw ranking without considering the specifics of your channel.
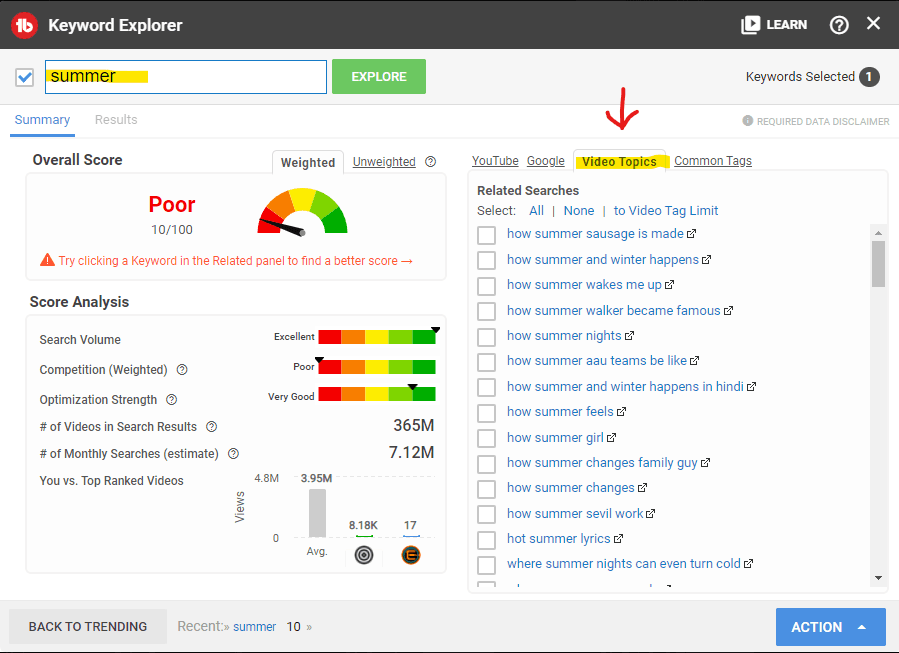
TubeBuddy also shows you the interest over time for the topic on YouTube and Google – separately. There’s a hidden gem in that upper right hand section of the Keyword Explorer. It’s the tab labeled “Video Topics” which shows a whole list of questions related to the keyword. For example, I put in the word Summer and on that tab I see questions like “how summer sausage is made” and “how summer and winter happens?”, just to name a few. This feature is really handy for finding the questions people are searching for as they relate to your topic.
The last tab on the right hand side of the TubeBuddy keyword explorer is the common tags list. You can select some or all of those recommended tags and save them to a list inside TubeBuddy. When it’s time to publish your video, you’ll just click the button on your video details screen (right inside YouTube) to copy the tags in from that list.
You’ll also see, on this same compact screen, a list of other keywords to consider. By clicking any one of those suggestions, you get a report just like what was provided for the original keyword you searched with all the details described above.
Publishing Tools
There are so many boxes to fill in when publishing a video on YouTube! It’s not a bad thing and, since YouTube puts all those things on there, it makes sense to fill in as many as possible. But, by the time I’ve planned, researched, filmed, and edited the video I’m excited to get it published and a little impatient. Having some tools to help me get through all of that was a big deal. TubeBuddy has several tools that help.
Upload Defaults
YouTube lets you create a set of defaults (description, tags, language, etc.) for your channel. TubeBuddy lets you create multiple upload default profiles per channel. If your channel does a few different types of videos and each of those types has some fundamental tags, things you want to add in the description, and other settings that are alike for the type but different for different types, this is really handy. It’s super simple to use – just pick the profile you want to use from your list by clicking the TubeBuddy icon next to the upload defaults button on the publish screen.
AI Title Generator
If you somehow make it to the publish screen and still don’t have a title for your video yet (I don’t recommend that, but I’ve been guilty of it myself) you can type in your keywords, click the button below the title, and TubeBuddy will offer you a list of titles to consider.
Add Chapters
This tool let’s you play your video through and, when you get to a spot where it’s time for a chapter, type the name and the timestamps are automatically added. It also keeps you from making mistakes in the times or requirements for chapters. When finished, it adds all the chapters you created to your video description. I don’t use this tool anymore because it’s quicker and easier for me to do in Descript. But, before I had Descript, this was a lot faster than having to type up all the timestamps.

Create Thumbnail
Personally, I use Canva to create my thumbnails and I recommend it. But, TubeBuddy does include a thumbnail creator right there in the YouTube publish screen. It let’s you select a frame from the video and apply some text. It’s not fancy and the creative options are very limited. I can’t think of a scenario where I would use it.
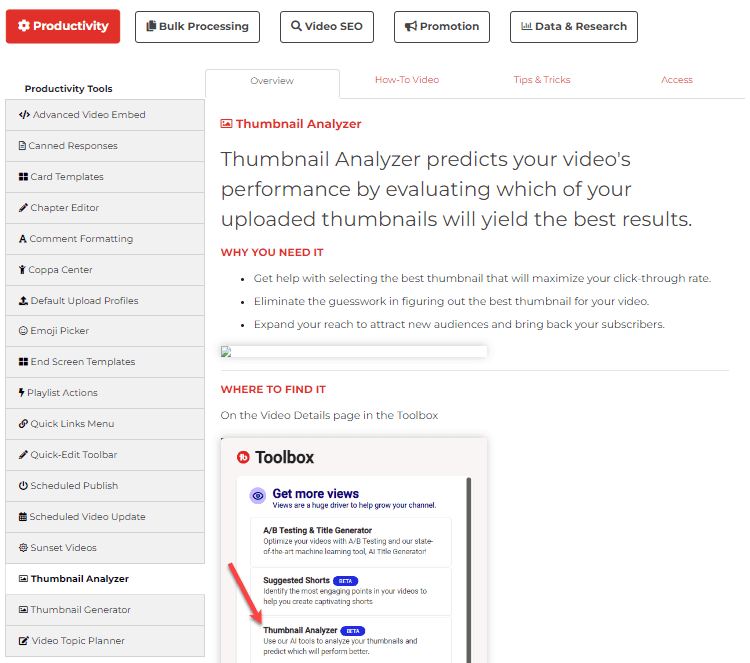
Thumbnail Analyzer
This is a new tool and it’s still learning. You upload a few different thumbnails and TubeBuddy’s AI robots will analyze each of them and give you a prediction about which one will have a better CTR (Click Through Rate.) TubeBuddy is upfront that this is experimental – but I can see huge potential if they’re able to train this and test it to the point that the predictions are really reliable.
Tags
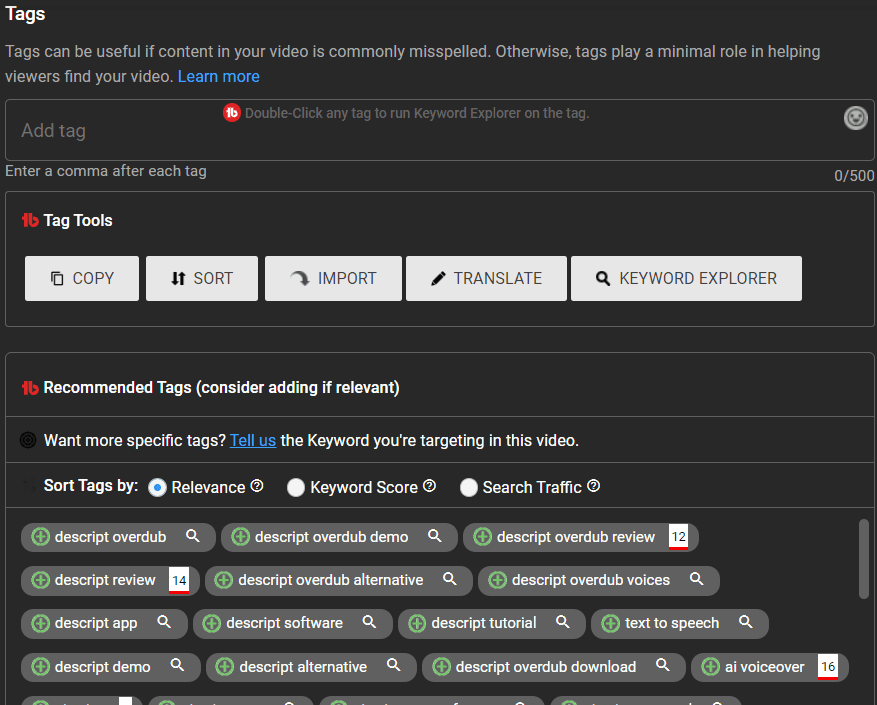
This is the tool I appreciate most in TubeBuddy. Just below the box where you add your tags, you’ll see some buttons and then a box with a whole list of tags. If you have tag lists saved you can throw tags from a list in the box with one click. If you tell TubeBuddy the keyword you’re shooting for, it will give you a list related to that keyword.
If you do nothing at all, it will still give you a list based on the title of your video. Just click the tags you want to add and they move instantly from the suggestion box to the tag box. I know, tags don’t play a huge role in getting views anymore. But, they must mean something or YouTube wouldn’t be asking for them. Meanwhile, tags are the last thing I think about until I go to publish the video and that’s not the time I want to sit and come up with dozens of words I think might be relevant.
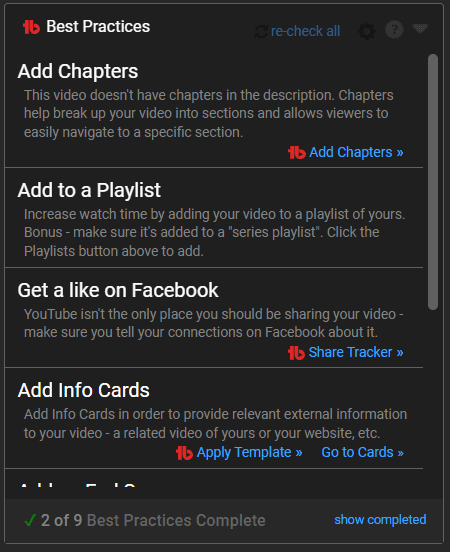
Best Practices Check
The best practices panel (on the publish screen) shows the recommended steps that you haven’t completed. For instance, add chapters, add tags, add the video to a playlist, and so on. It’s really easy to overlook a box when you’re uploading a video. This tools is super-helpful in making sure you give your video the best chance for success. And, you can customize the best practices checklist – add things you want to make sure you never forget, or take things out that you’ve decided you never want to do.
User Interface
This gets a little confusing, so stick with me here… TubeBuddy integrates right into YouTube. So, the tools that help you publish faster are seamlessly built right into the publish page. They get an A+ for that experience. Likewise, TubeBuddy analytics display alongside a video on YouTube (whether it’s your video or someone else’s you’re looking at.) No thinking or clicking required – it’s just there.
Some features, however, like your settings and defaults, are best managed from the TubeBuddy website. But, it’s not exactly easy or obvious how to get from the TubeBuddy website to some tools, like the keyword explorer.Keyword explorer, and some other tools, are accessed through the browser extension (plugin.)
None of this is difficult and, once I find what I’m looking for I feel like an idiot because it was only a click or two away the whole time.
There are a LOT of tools in TubeBuddy. Some of them need to be embedded in a particular YouTube page to make life easer. Some of them need to be “plugged in” to YouTube. And others really work best outside those environments. I believe that’s why we end up feeling like the tools are scattered around.
Fortunately, TubeBuddy gives us the Tools Page that neatly breaks down every single tool, tells you why you might want to use it, and shows you exactly where to find it.
Many tools are accessible from multiple locations too (something I didn’t figure out until I found this page months after I started using TubeBuddy.) Don’t be a dummy like me – bookmark that page when you start with TubeBuddy and you’ll be able to easily find what you need and find other TubeBuddy tools that you may have overlooked or now have a need for.
Pricing
TubeBuddyis subscription based and the pricing is straight-forward with a few tiers. There’s a 20% discount for annual billing and TubeBuddy offers an incredible discount on the Pro tier for creators with less than 1k subscribers (that’s the plan I’m on.) It’s a steal!! Just use code RisingStarBuddy to get the discount.
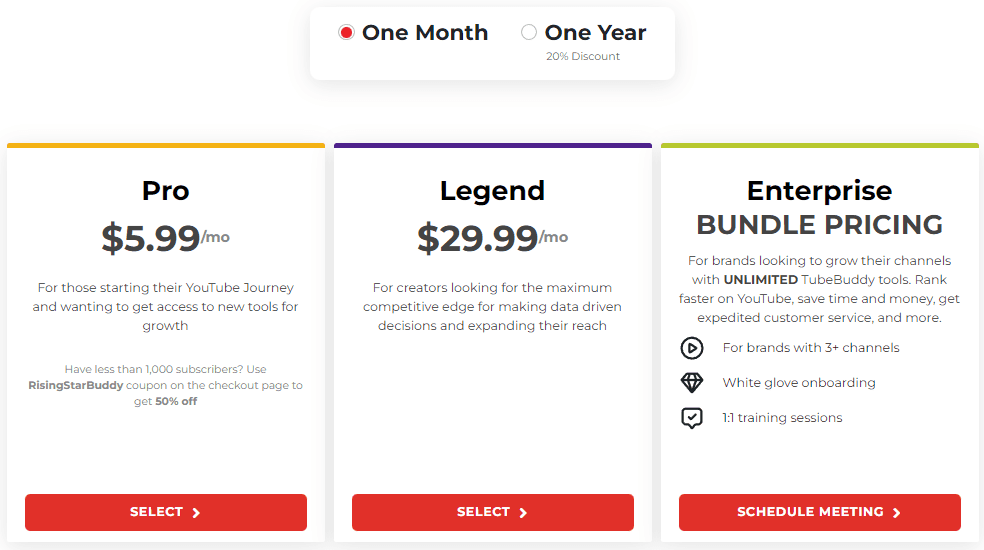
There’s also a free tier, but it lacks (or limits) many of the tools. The Pro tier is so darn cheap (especially if you have less than 1k subscribers) I couldn’t get my credit card out fast enough!
If cash is really tight or you just want to try TubeBuddy for yourself before you decide to buy, then the free plan is a great way to go.
Pros & Cons
Overall, I give TubeBuddy 4 out of 5 stars. I’m happy with how it helps me with keyword research and it definitely saves me a ton of time and frustration during the upload process.
- Keyword research that isn't complicated or overwhelming
- Identifies keywords I wouldn't have considered
- Gives me ideas for video topics
- Adding relevant tags during upload is super-easy
- Best Practices check makes sure I'm not missing any important stuff during upload
- Pro tier pricing has a lot of features at a low price (and 1/2 off for channels with <1k subs!)
- The interface feels dated
- There's no central place to access ALL tools
- Keyword explorer only shows search volume for current keyword, not relevant or suggested keywords